Comet photography. Procedure and image processing.
Comets move fast when they’re close to Earth. Too fast for astrophotography? How to succeed despite their speed.
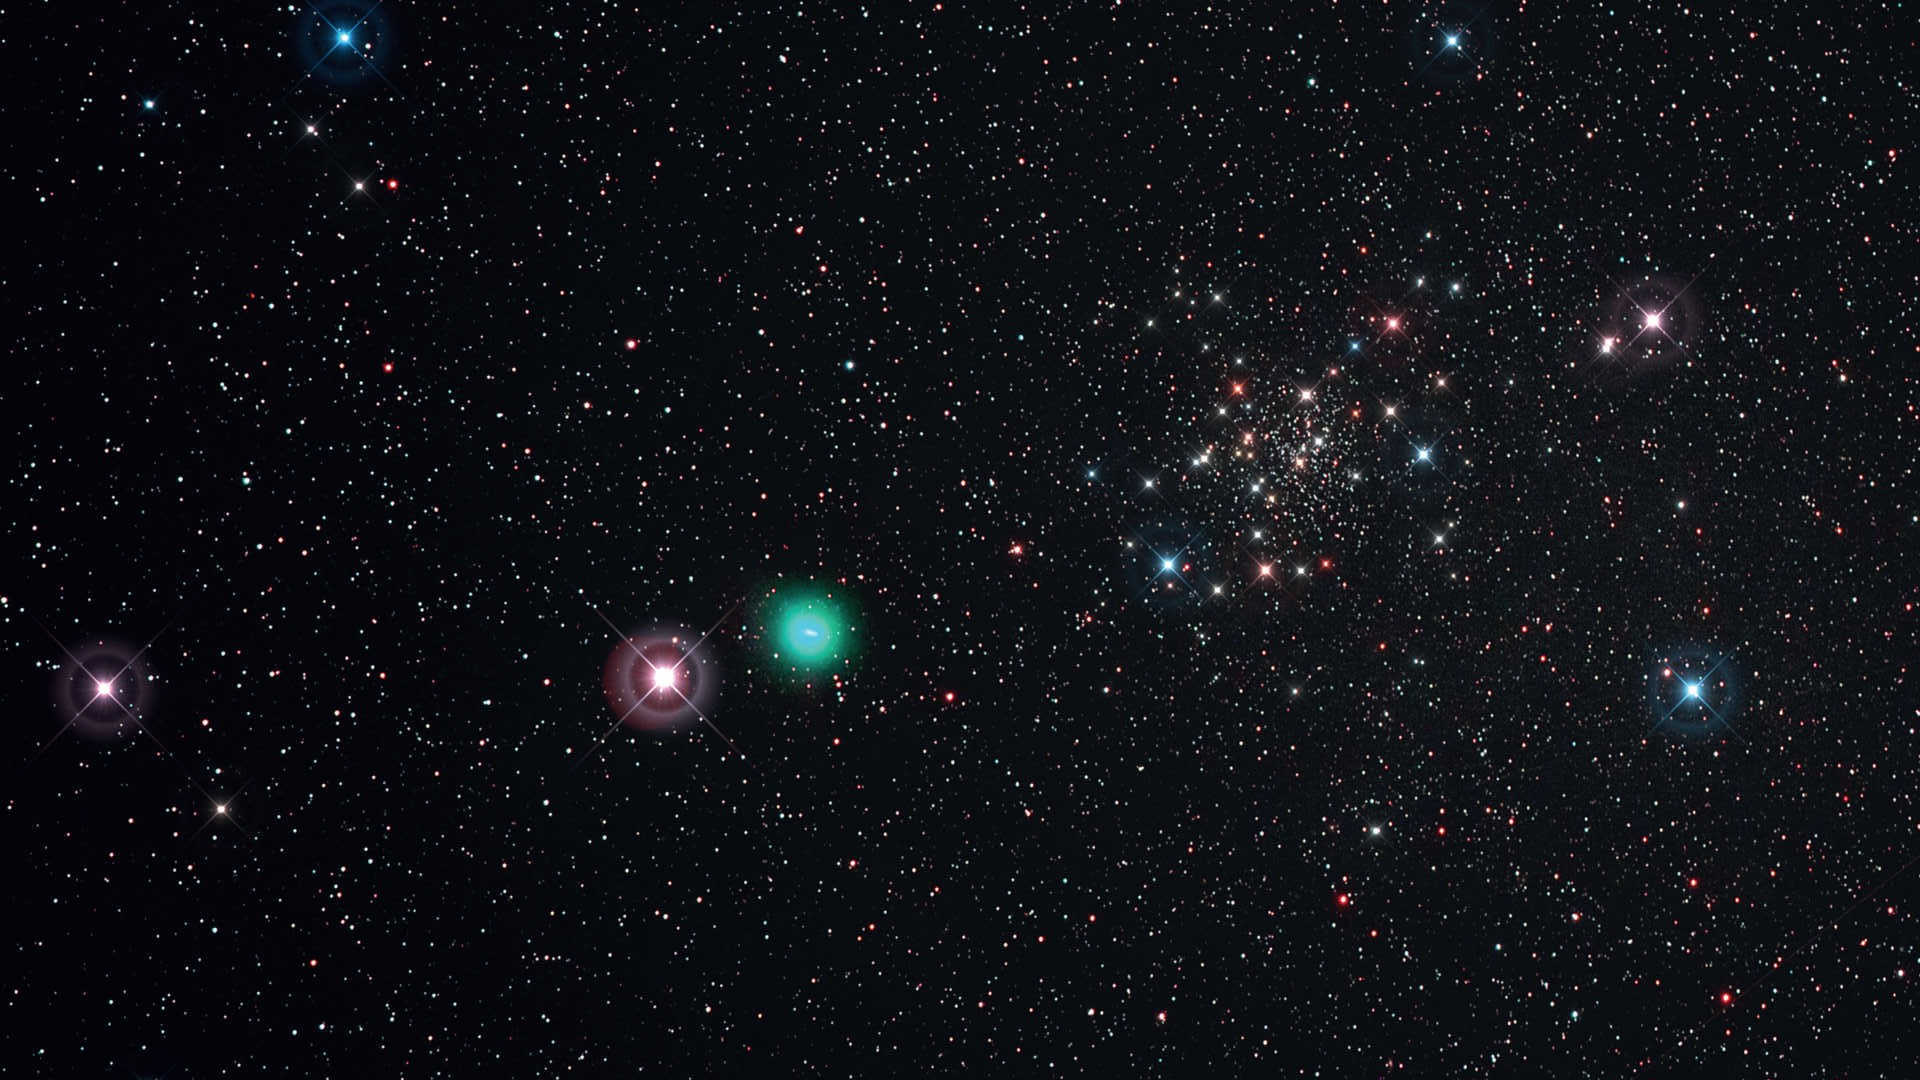 The clear night of 21 May 2015 enabled this picture of the comet C/2014 Q2 (Lovejoy) as it passed the edge of the cluster NGC188. This image was captured with a Kowa telephoto lens/scope (focal length: 350 mm, F/4) on a (Hα-modified) Canon D6 with UHC-S filter. Composite image consisting of six shots each with an exposure time of 450 seconds (ISO 800, total exposure time: 45 minutes). Processed with DeepSkyStacker and Photoshop; spikes added only for aesthetic reasons. U. Dittler
Get impressive comet images with a telescope and a DSLR.
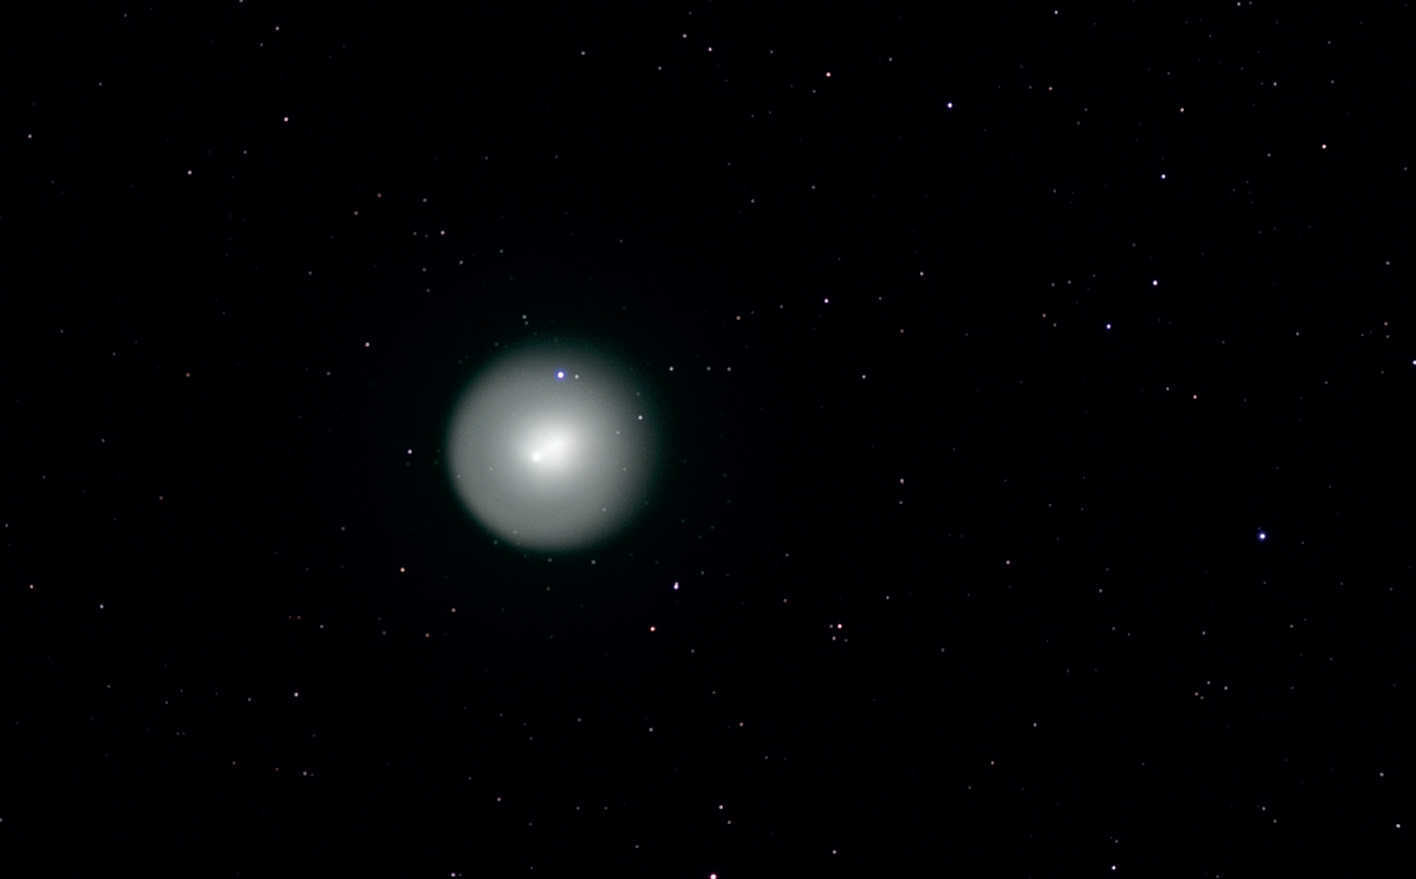 In 2007, the periodic comet 17P (Holmes) dominated the autumn sky. The clear shape and size of the comet's head can be clearly seen in this monochrome picture, which was taken on 1 November 2007 with a cooled CCD camera and a Takahashi FS-102. Even though a green shining comet is typical of colour photography, still this picture also illustrates the particular charm of a monochrome image. U. Dittler
 Comets are especially appealing to many amateur astronomers and can be easily photographed with an existing telescope and a DSLR. After careful preparation, things start to get critical; but if you follow our tips and hints during nocturnal photography and the subsequent image processing, you can create some really impressive comet images.
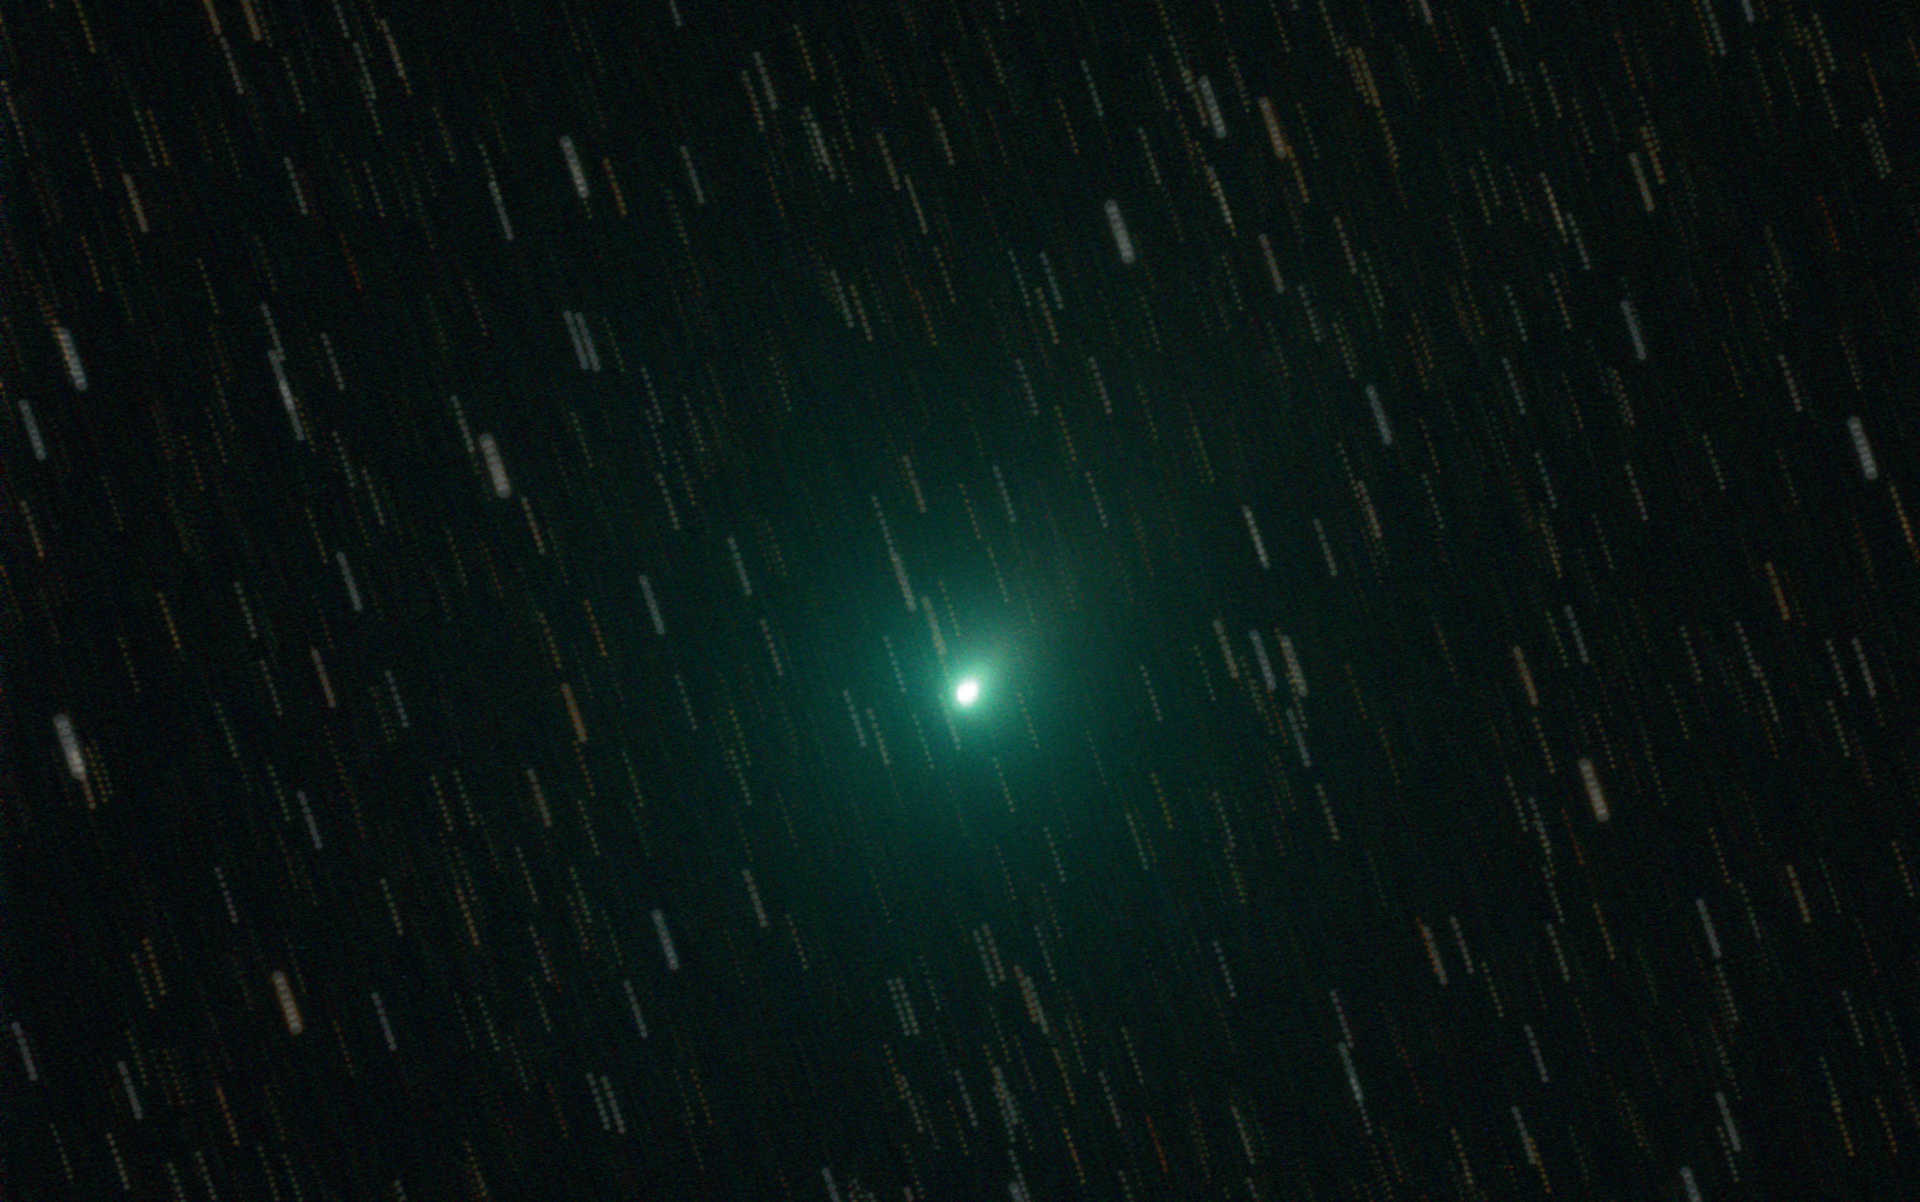 Composite image of comet 103P (Hartley). You have two image-processing options: either centre the individual images on the comet, so that the stars appear as lines on the composite image, thus impressively showing the dynamic movement of the comet across the night sky...
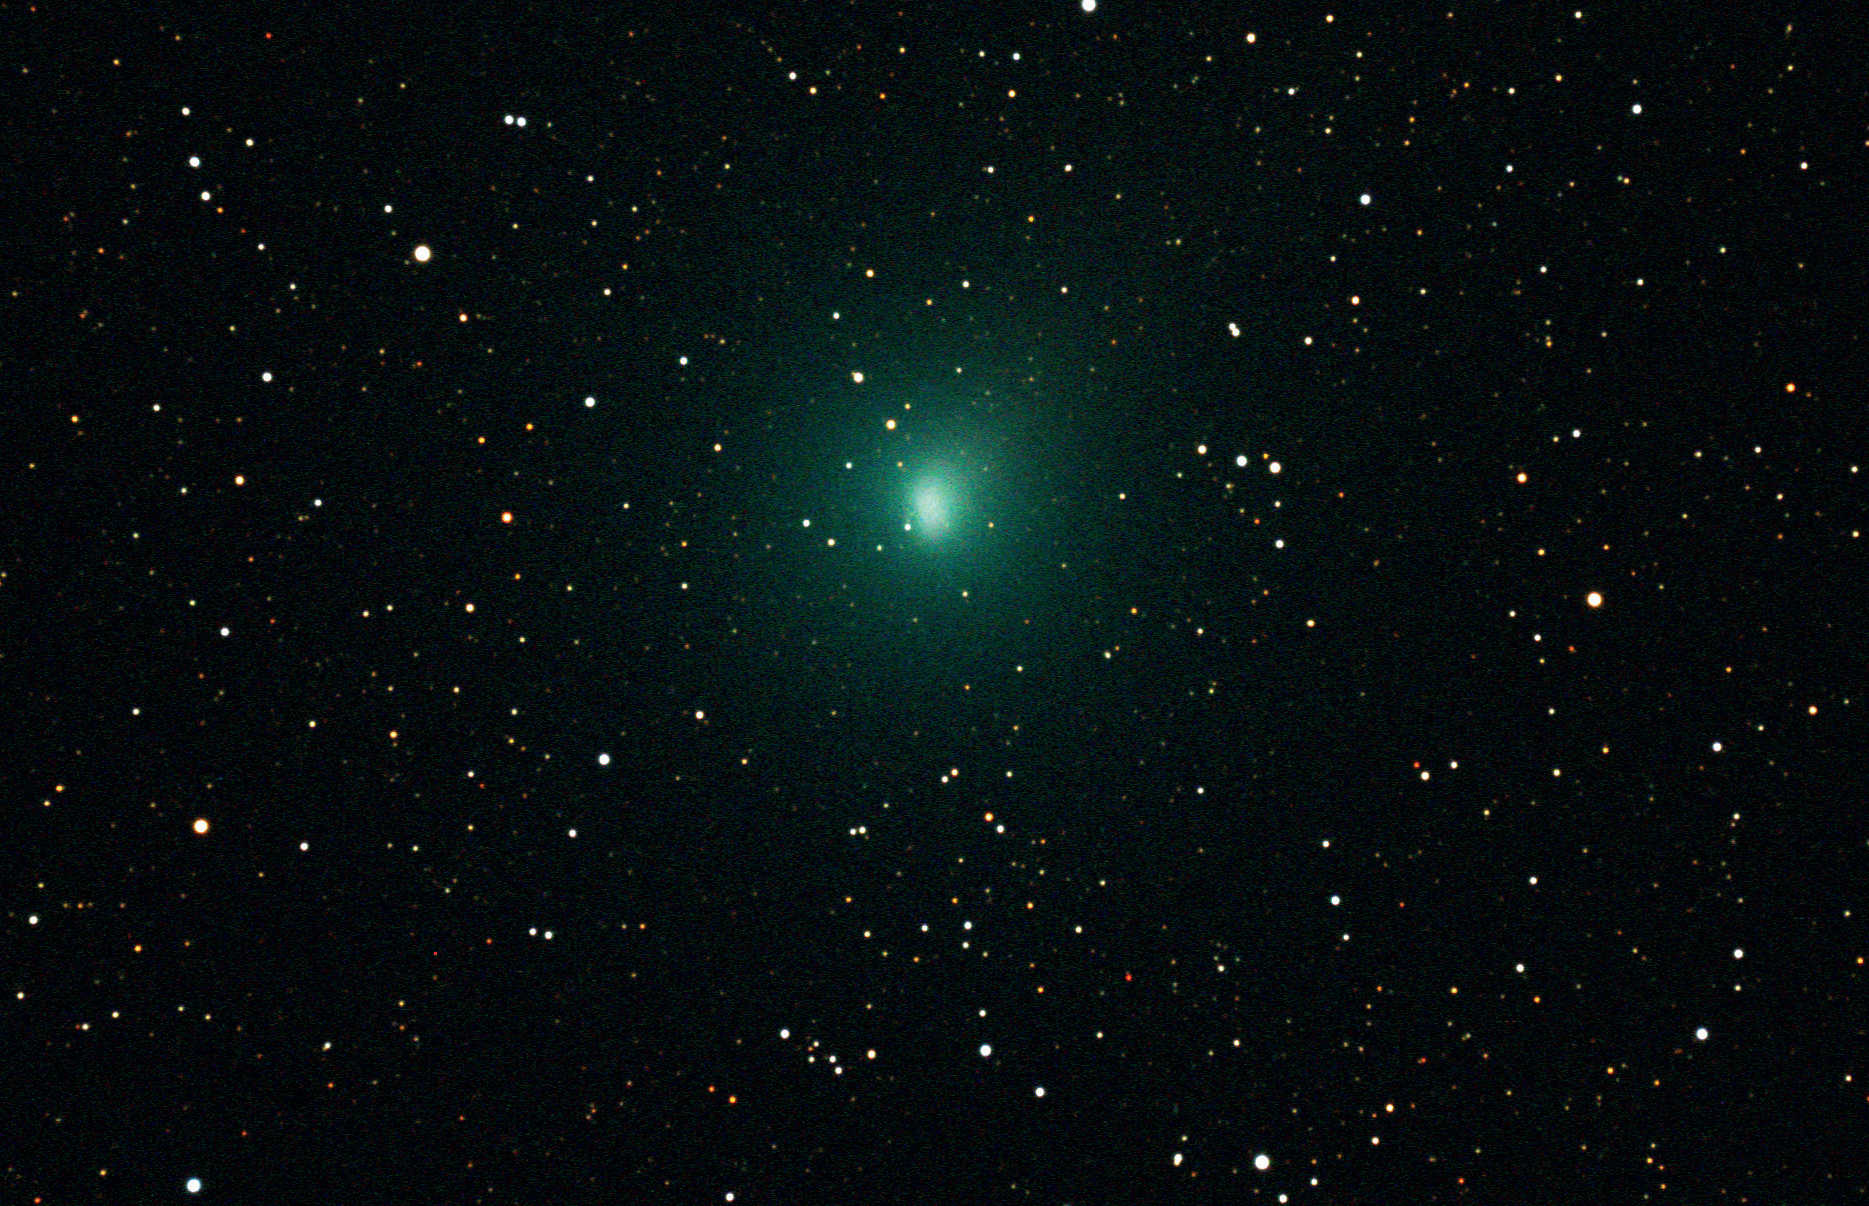 ... or you focus your image on the stars so that they appear to be point-shaped, but the comet's head is less sharply delineated. The raw data was produced on 11 October 2010 with a cooled SBIG ST-4000XCM CCD camera on a Takahashi TOA-130. These composite images are made up of eight single shots each with an exposure time of 120 seconds.
 In a previous section of this photography workshop, we described which equipment is needed for successful comet photography: a stable mount, a telescope and an adaptable camera. Telescopes with shorter focal lengths of less than 1,000 mm together with cooled CCD cameras or digital SLR cameras have proven their worth. In addition to the technical equipment, careful planning is also necessary to know which comets are visible and the best time to observe them.
Comets in focus
Comets up to magnitude 10 are usually quite easy to find in the night sky. The relevant finding charts will help you locate them by star-hopping from nearby familiar bright stars. Alternatively, with a carefully aligned (or fixed) telescope set-up, the current comet coordinates can of course also be entered into a GoTo mount. If a cooled CCD camera is used for comet photography, the position of the comet on the recording chip can be easily tracked and optimised on the connected laptop screen, using the binning mode for lower resolution and shorter exposure time images.
On the other hand, since most DSLR cameras' displays are lower contrast, a DSLR’s Live View mode is a great way to focus accurately on a bright star, although the exact position of the comet on the chip can usually only be seen when making test shots. It is sufficient if these test images are exposed just long enough so that the position of the comet with reference to some brighter stars can be identified, then the Live View mode can be used again to position these brighter reference stars so that the comet is located centrally on the image sensor. Even if the exposure times for comet photography are usually only in the range of a few seconds up to a few minutes, and are thus considerably shorter than is usual for deep sky photography, it is advisable to use an autoguider to ensure that your telescope/camera combination is tracking precisely.
For comet photography with modern DSLR cameras, the ISO value can usually be raised to 2500 ISO without any problems, as image errors caused by an unfavourable signal-to-noise ratio can be reduced by the subsequent stacking of images and the use of darks. For the individual exposures, a glance at the histogram can help to capture as many details of the comet's head and tail as possible, without overexposing parts of the image or even the entire comet's head to such an extent that they blow out.
Depending on the location and observation conditions, the use of UHC-E (or CLS) filters may be useful to reduce light pollution. The use of an [OIII] filter can also help to accentuate a comet’s gas tail. If several optimally exposed images of the comet – for example 12 to 18 – can be captured (don't forget to make darks!), you'll have two interesting image processing alternatives.
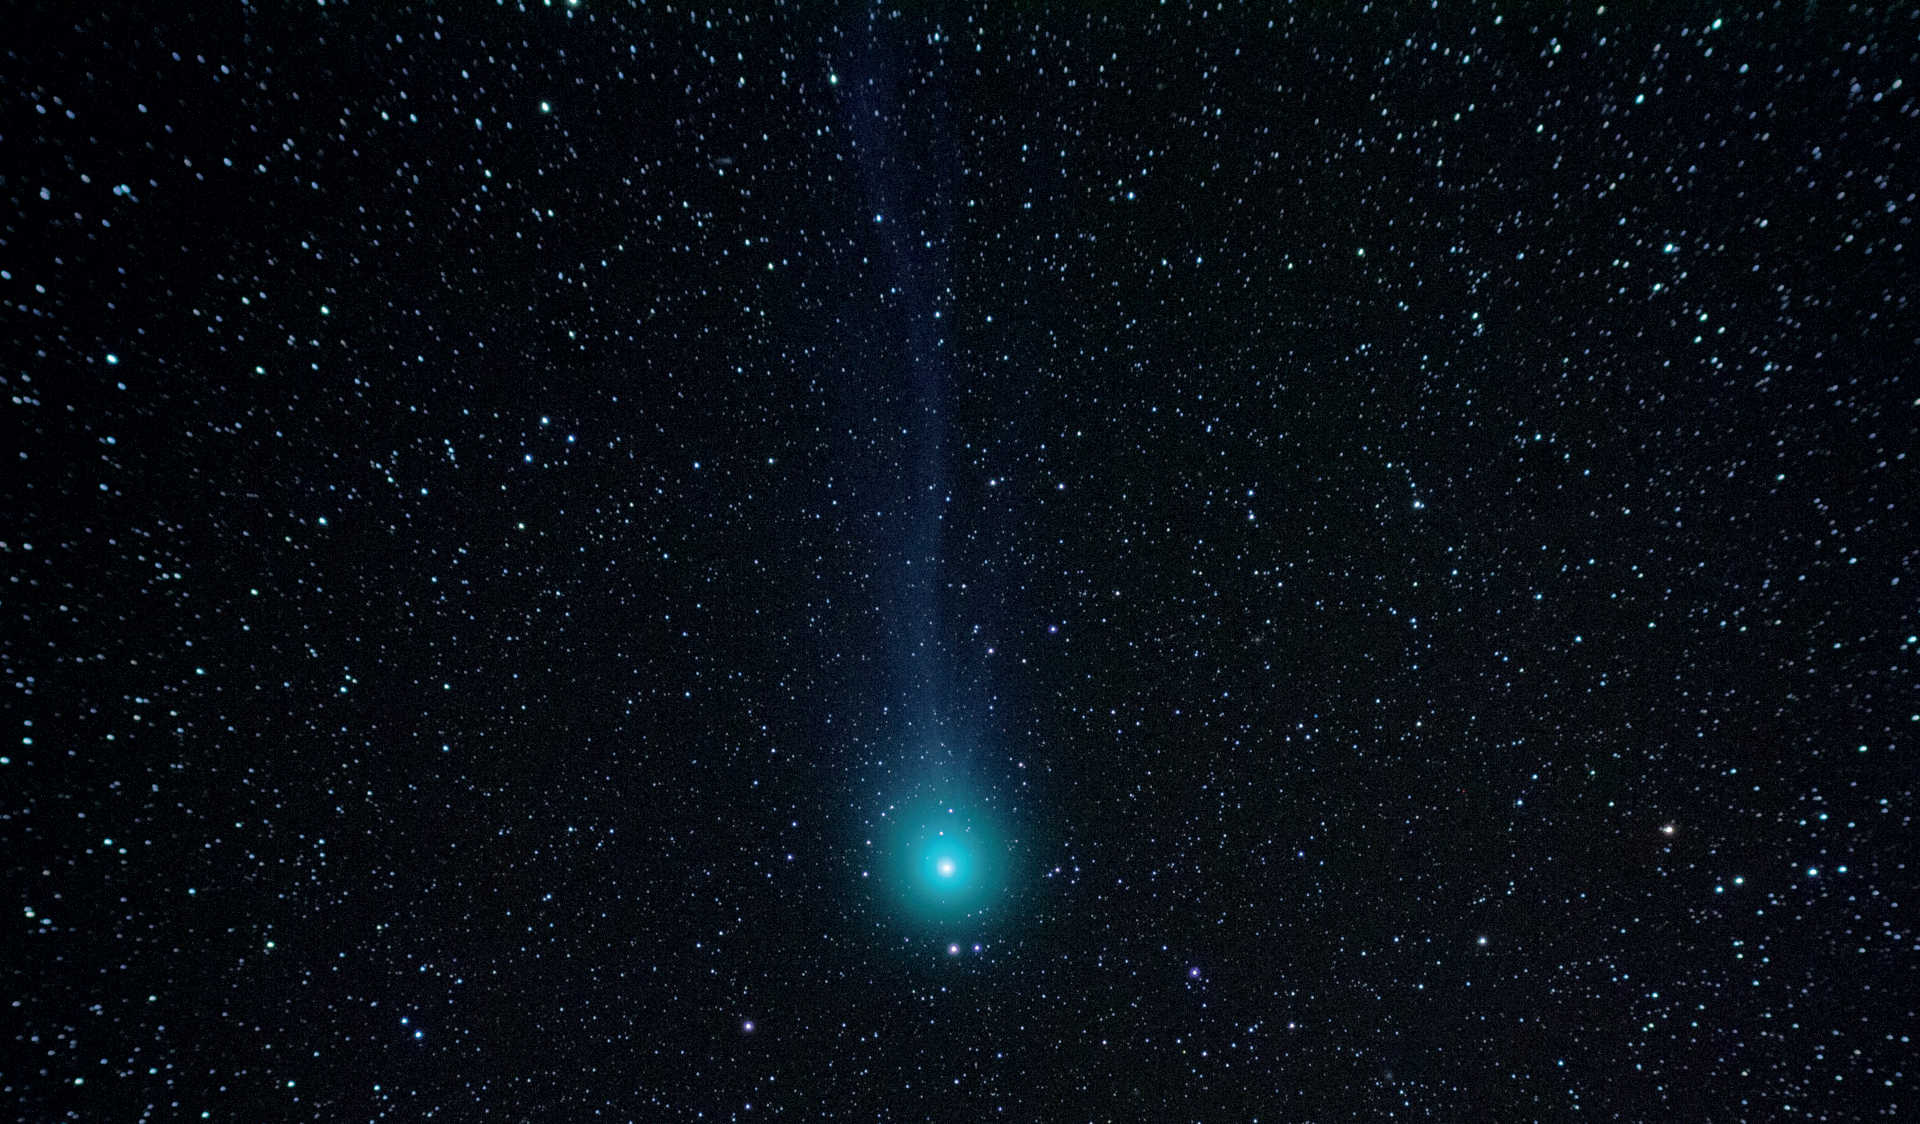 A particular challenge in comet photography is to make the comet tail visible. In this image from 7 February 2015, comet C/2014 Q2 (Lovejoy) displays its faint tail. The picture was taken with a Canon DSLR on a Takahashi FS-60 (focal length: 355 mm; F/5.9). The composite picture consists of five images, each with an exposure time of 120 seconds. U. Dittler
Two alternatives for image processing
When they’re close to Earth, many comets area actually moving faster in the sky than you might at first think – this results in two different possibilities for image processing. On the one hand, a single comet image could be processed in the usual way by superimposing it (for example manually in Photoshop or automatically in DeepSkyStacker) onto a composite image that is oriented to the stars in the vicinity of the comet at the time the comet image was captured. Due to the movement of the comet during the imaging session, the comet's head in the composite image will have shifted somewhat – i.e. it will be less clearly delineated. Alternatively, all the individual images could be aligned and centred on the comet head – so that this is sharply defined. In this method of image processing, the stars will appear as lines and thus illustrate the dynamic movement of the comet in the final composite image.
Author: Ullrich Dittler / Licence: Oculum-Verlag GmbH
